DIY | Vertical Herb Garden
I love to cook with fresh herbs, so I always dedicate space in my raised planter beds for a nice little herb garden each summer. Well believe it or not, three raised planter beds just isn't a lot of room when it comes to a vegetable garden. Between the tomatoes, peppers, beets and lettuce, there's not a ton of room for herbs, too. Plus, I use herbs just about every night, so it's nice to have them close by. Traipsing through the stones in our back patio to retrieve some basil for homemade pizza isn't a ton of fun when you're barefoot.
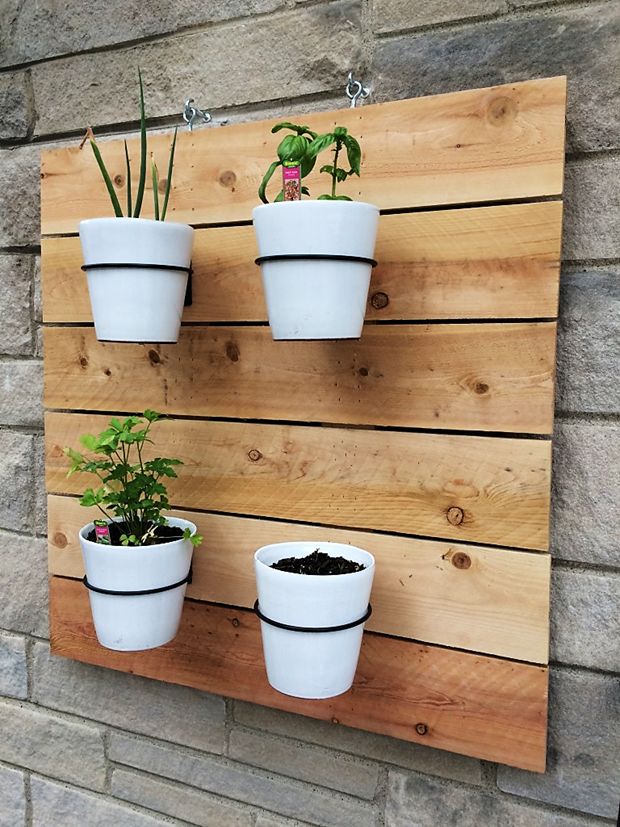
So this year, we decided to build a vertical herb garden right outside our backdoor! The requirements? It needed to house at least four herbs at any one time, it needed to be within reaching distance of the back door, it should look modern-ish, and it needed to fit-in with our other decor. Simple enough, right?
Tyler and I talked through a number of options but ultimately landed on our final design after finding these white planters and wall planter hooks on sale at Crate & Barrel. Since the pots were removable, I could even bring the planters inside in the winter, so we grabbed four of each and headed off to the hardware store to buy the rest of our supplies.

Supplies
(4) White Planters - $31.84 (on sale)
(4) Wall Planter Hooks - $17.60 (on sale)
(6) Cedar Wood Fence Pickets - $16.68
(2) Steel Screw Eye Hooks - $2.48
(2) Steel Screw Eyes - $2.48
(2) 1" x 3' Cedar boards to support the back - we used spare cedar lying in the garage
(2) Wall Plugs to fit Steel Screw Hook
Nails for nail gun - You could also hammer in some some nails if you don't have a nail gun
Masonry Bit (if drilling into stone)
Total Cost: $71.08 + tax
Here's a nice little "before" photo of the space.

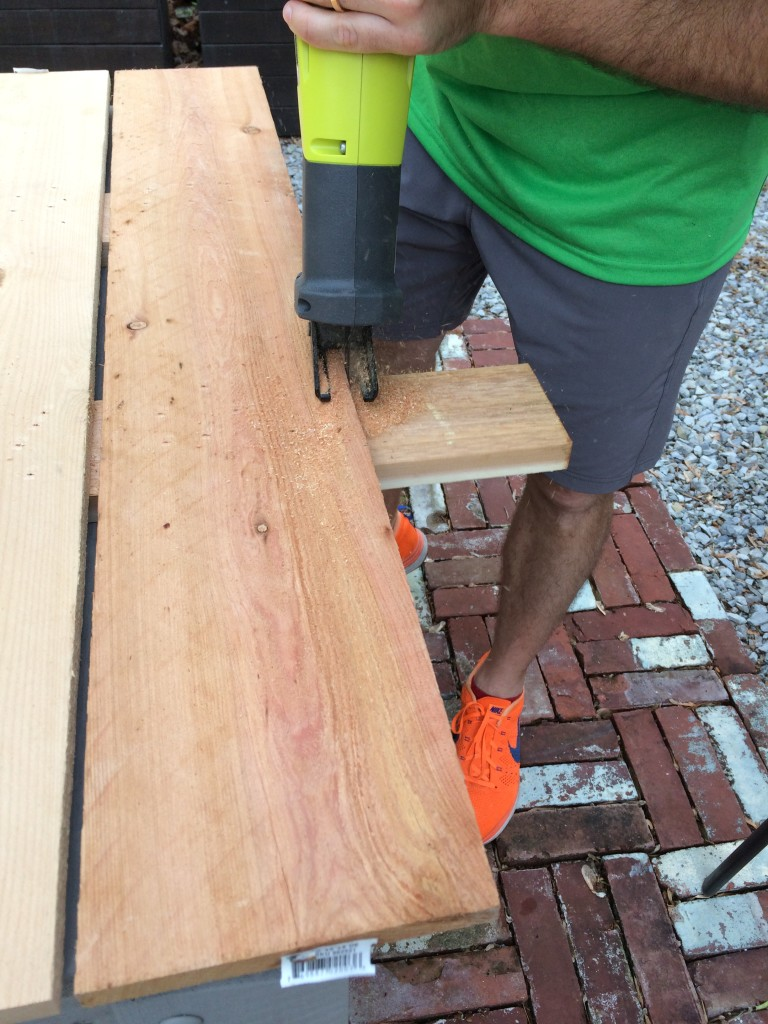
We chose cedar fence pickets because they're inexpensive and we used them last year on our privacy screens and air conditioner cover. Using them for our vertical garden would help keep things consistent through-out the space. To get started, we measured the appropriate length on each of our cedar pickets. We decided to go with a 3'x3' square, so each cut was identical. Tyler used his chop saw to ensure a consistent and clean line.

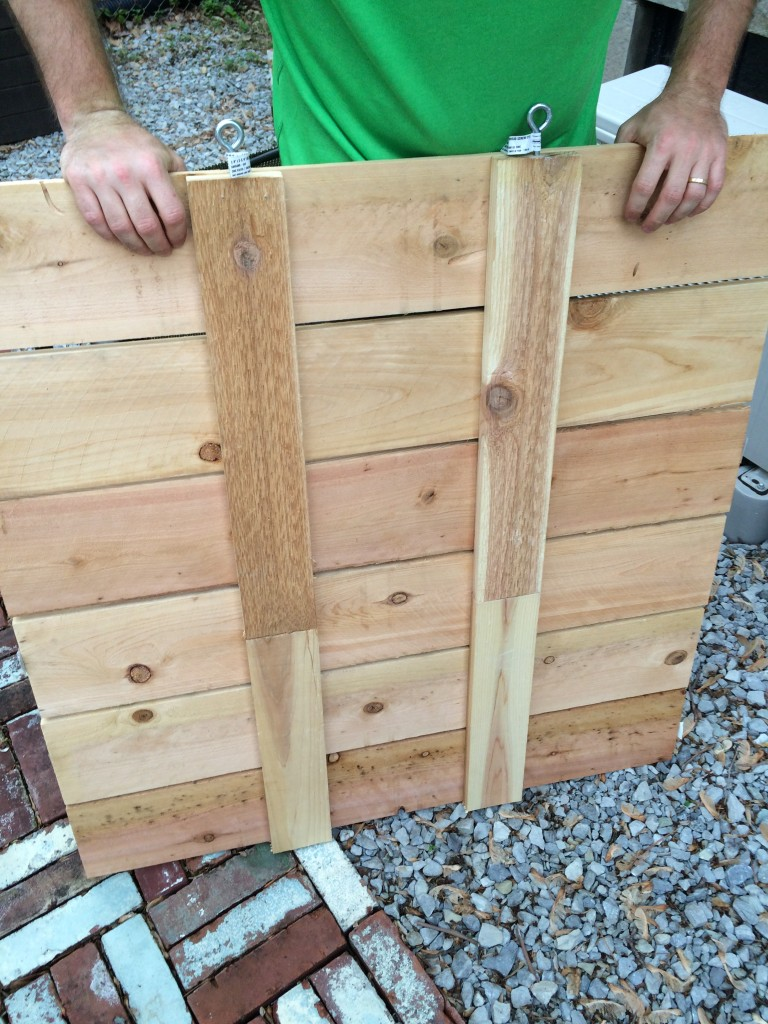
After the boards were cut, we gathered up a few spare pieces of cedar lying in the garage and pre-drilled a hole in the top of each. Pre-drilling a hole made screwing in the steel eye much easier. It also helped prevent us from twisting the hook through the side of the board since our piece of cedar wasn't very thick.
If you're looking to re-create this, you may want to consider using a thicker piece of wood on the back but note that your vertical garden would then sit further away from the wall.

After the eyes were screwed into place, we nailed the cedar pickets to the spare wood with a nail gun. To ensure each board was evenly spaced, we used an old shim and butted each board up to it before securing. You could use about anything you have on hand, but it's important that the spacing remains consistent. Once we reached our desired 3' length, we simply cut off the excess board supports with a jigsaw.

At this point we had a 3'x3' square with steel eyes screwed into the top. Easy-peasy! As you can see in the photo below, our "spare wood" was in all sorts of lengths. That's perfectly fine! Feel free to use whatever you have on hand as long as it's prepped to withstand the weather (cedar is a good option). No need for the back to be pretty - we just want a secure base in which to secure our horizontal boards.
Next up? Attach the planter hooks. We spaced the hooks evenly on our boards and screwed them in with the provided screws. Be sure to leave enough room between the rows of planters to ensure your herbs have plenty of vertical room to grow!

Once the hooks were attached, it was time to drill holes into the limestone for hanging. We measured the distance between our steel eyes and made sure to install our hooks at the same distance. Instead of drilling into the perfectly good stone, we decided to put our holes in the mortar. Tyler used his fancy Milwaukee Hammer Drill (I think he may love it more than me) and a masonry bit to pre-drill his holes. He started with a super small bit and moved his way up until our wall plugs securely fit inside.


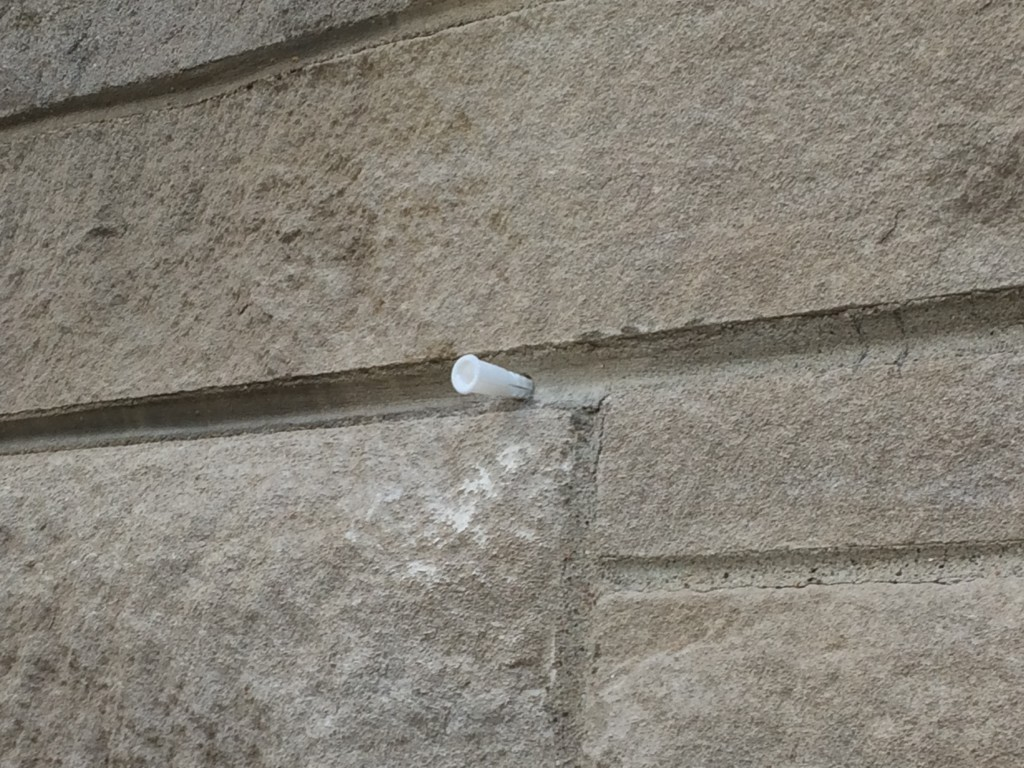
We gave the wall plugs a light tap with a hammer and then screwed in our hooks by hand.

Once everything was in place, we simply slid our "eyes" up and over our "hooks". This was definitely a two-person job because we had to hold the entire thing upside down, but it worked out perfectly.


And then it was down to simply setting our planters inside the hoops!

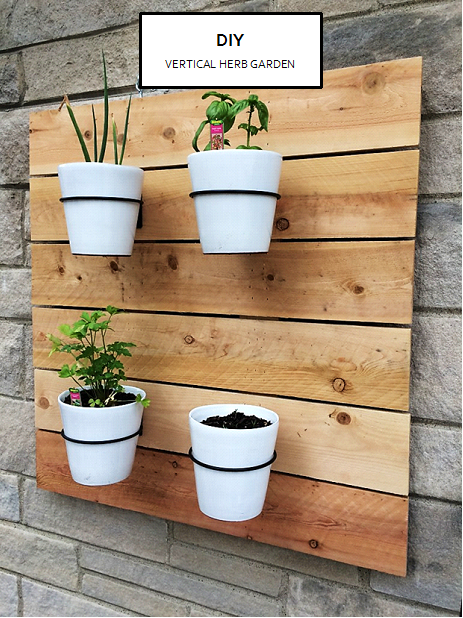
Here's a little before and after for comparison:
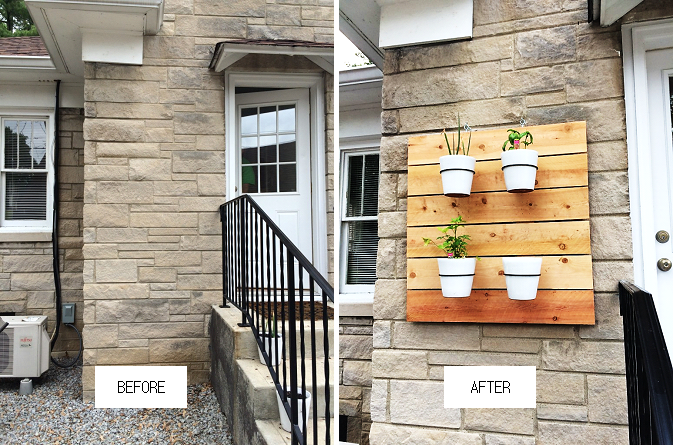
I'm really happy with the way it turned out. I took these photos before we left for California, and all of my herbs are at least twice this size now. I think it's safe to say they like their new home!